What is M³?

Meeting Media Manager, or for short, is an app for Windows, macOS and Linux, that automatically downloads pictures and videos that will be considered during congregation meetings of Jehovah’s Witnesses, in any language found on JW.org.

It features support for managing custom and recurring media, an optional synchronization feature for members of the same congregation, as well as support for multiple congregations and/or groups using the same computer account.

Note: M³ used to be known as JWMMF (JW Meeting Media Fetcher), but was renamed in May 2022.

What can M³ do?

M³ allows you to easily and automatically download, synchronize, share and present all meeting media.

For hybrid or in-person congregation meetings, the integrated media presentation mode has all the features needed to simplify the task of sharing media with the congregation, including:

As for fully remote congregation Zoom meetings, the inbuilt MP4 conversion feature in M³ enables you to share media files of all types easily, using Zoom’s native MP4 sharing feature.

Does M³ work in my language?

Yes! Media for meetings of Jehovah’s Witnesses can be automatically downloaded in any of the hundreds of language that are available on JW.org. The list of available languages is dynamically updated; all you need to do is select which one you want.

In addition, M³ itself has been translated into several languages, by many volunteers; you can therefore configure the language you would like to be displayed in M³’s interface.

This app is made with love and a bit of spare time. Enjoy!

Screenshots

Meeting media sync in progress
Main screen
Main screen
Choose a week
Choose a week
Sync complete!
Sync complete!
Pre- and post-meeting music playing

Technical usage notes

The app should run as is on most modern computers running Windows, Linux, or macOS.

Windows: Installation and first launch

On opening the installer, you might get an error indicating that “Windows SmartScreen prevented an unrecognized app from starting”. This is due to the app not having a high number of downloads, and consequently not being explicitly “trusted” by Windows. To get around this, simply click on “More info”, then “Run anyway”.

Linux: Installation and first launch

As per the official AppImage documentation, if the app fails to open properly, confirm the output of the following command:

sysctl kernel.unprivileged_userns_clone

If the output is 0, then the AppImage will not run unless you run the following command, followed by a reboot:

echo kernel.unprivileged_userns_clone = 1 | sudo tee /etc/sysctl.d/00-local-userns.conf

Make sure you read up on what this entails before you do this.

macOS: Installation and first launch

If upon launching the app, you receive a warning that the app cannot be opened, either because “it was not downloaded from the App store” or because “the developer cannot be verified”, then this Apple support page will help you to get past that.

If you get a message indicating that you “do not have permission to open the application”, then try some solutions from this page, for example running the following command in Terminal.app:

codesign --force --deep --sign - "/path/to/Meeting Media Manager.app"

macOS: Issues with audio or microphone permissions in macOS Sonoma

Since macOS Sonoma, some users might encounter an issue where M³ repeatedly gives an error message indicating that it needs access to the microphone. Executing the following command in Terminal.app has resolved the issue for some:

codesign --force --deep --sign - "/path/to/Meeting Media Manager.app"

macOS: Auto-update

Unlike Windows and Linux, auto-update functionality is not implemented on macOS, and for technical reasons probably never will be. However, one of two things will happen for macOS users when an update is available:

  • M³ will attempt to download the update package and open it automatically, after which the user will have to manually complete the installation of the M³ update by dragging and dropping the updated app to their Applications folder. Then, they will be able to launch the newly updated M³ from their Applications folder as usual.
  • If the previous step fails at any stage, M³ will display a persistent notification indicating that an update is available, with a link to the update itself. A red, pulsing notification will also be displayed on the settings button in the main screen of M³. The M³ version number in the settings screen will turn into a button that, once clicked, opens the latest release’s download page automatically.

Media Presentation mode

Using media presentation mode

The media presentation and controller modes are designed for simplicity and to prevent mistakes during meetings.

Once the option Present media on an external monitor or in a separate window is enabled, the media presentation screen will automatically appear on the external monitor if present, or in a separate, draggable and resizable window if no external monitor was detected.

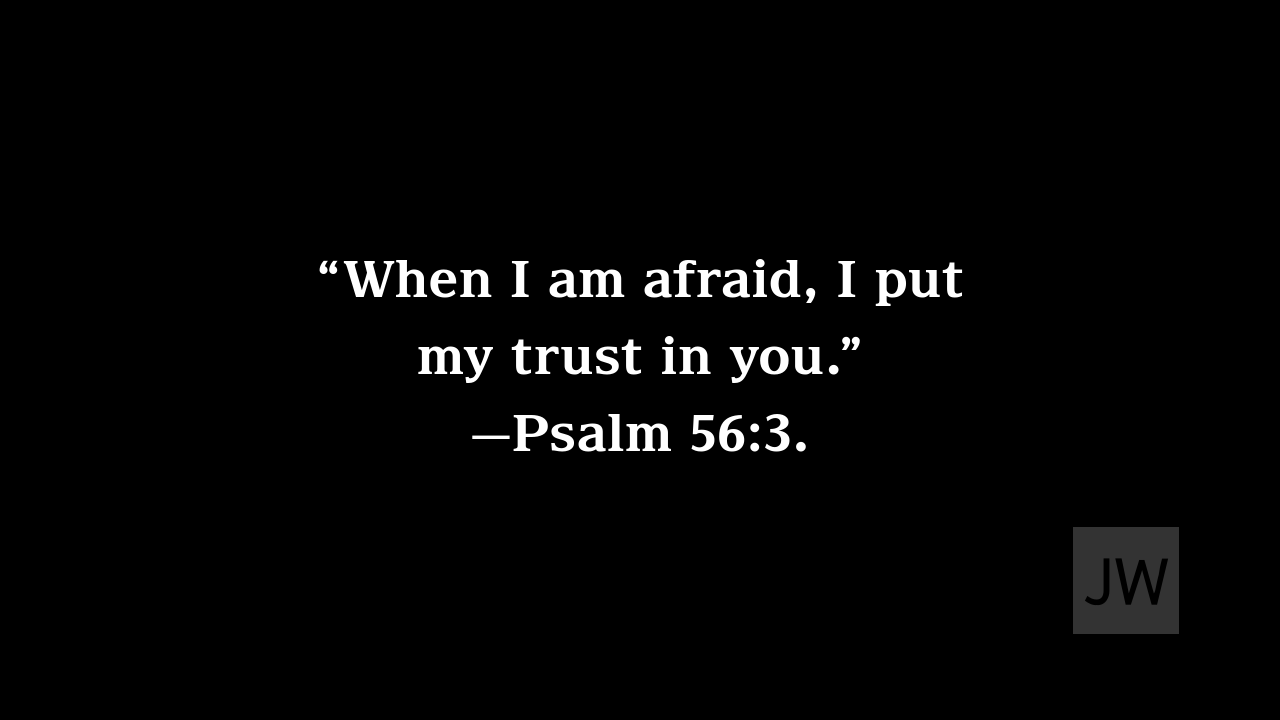
When in standby, the media presentation screen will display the background image that is configured in the settings. If no background image has been configured, then M³ will attempt to automatically fetch and display the yeartext.

If no background image is configured in the settings and the yeartext could not be loaded automatically, a black background will be displayed when on standby.

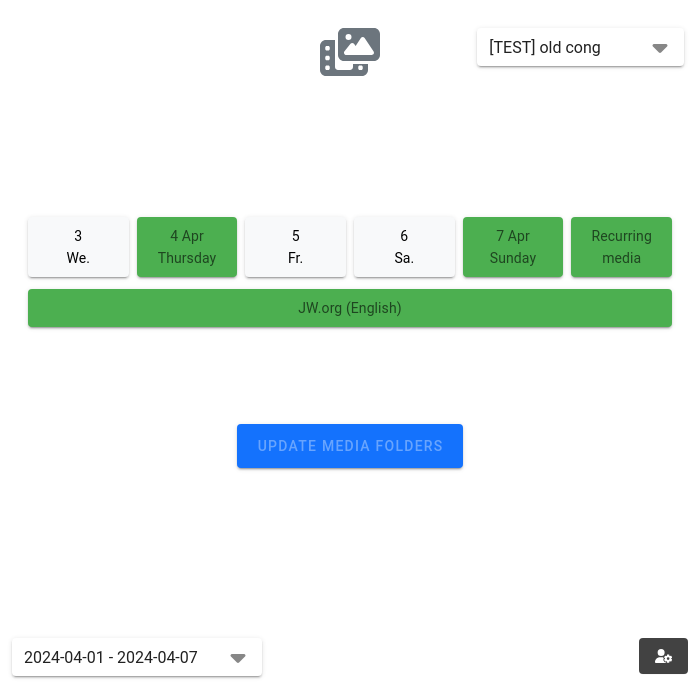
Media controller mode can be accessed by clicking the ▶️ (play) button on the main screen of M³, or by using the keyboard shortcut Alt D (for external display).

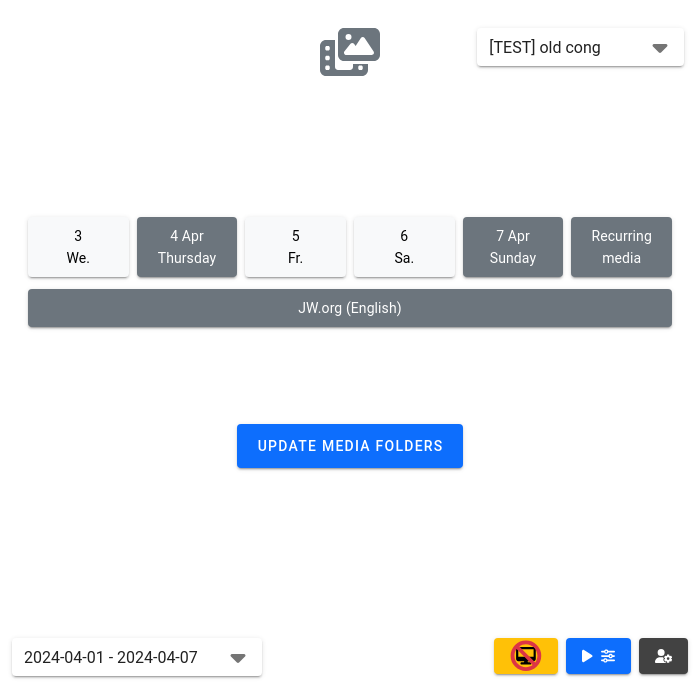
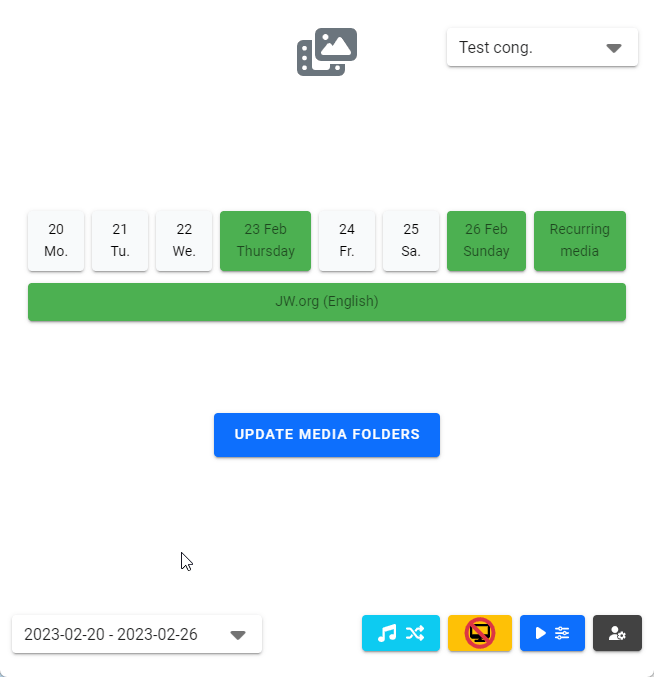
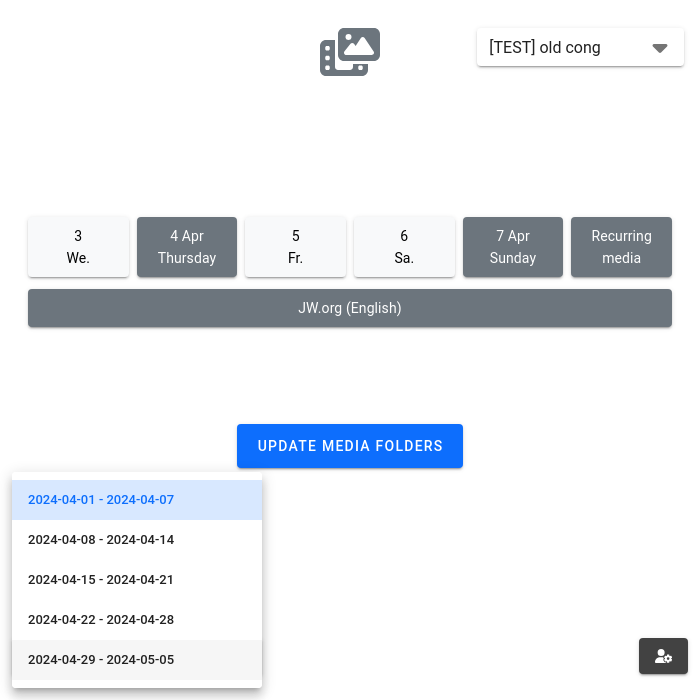
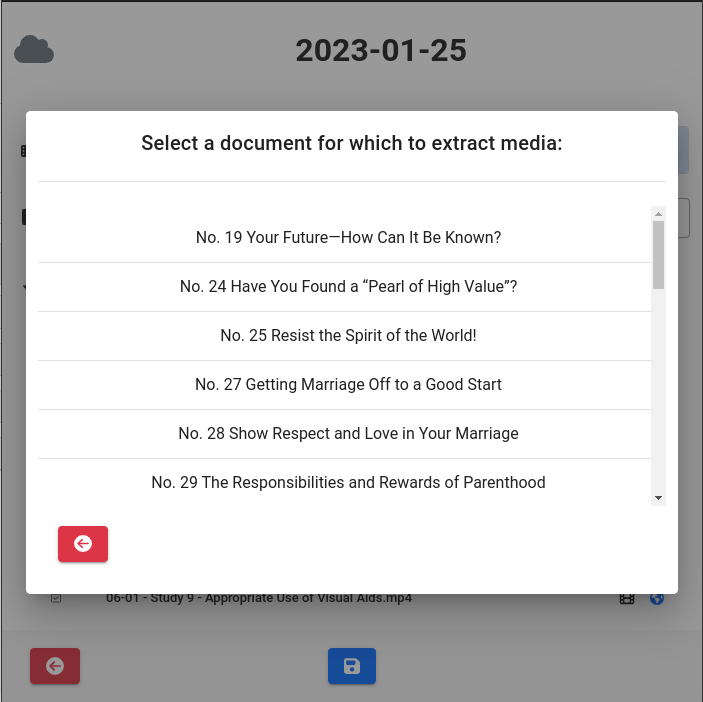
Once you have entered controller mode, the folder selection screen will allow you to select the date for which you’d like to display media. If the current day’s folder exists, it will automatically be preselected. Once a date is selected, you can still change the selected date at any time by clicking on the date selection button, in the top section.

Presenting media

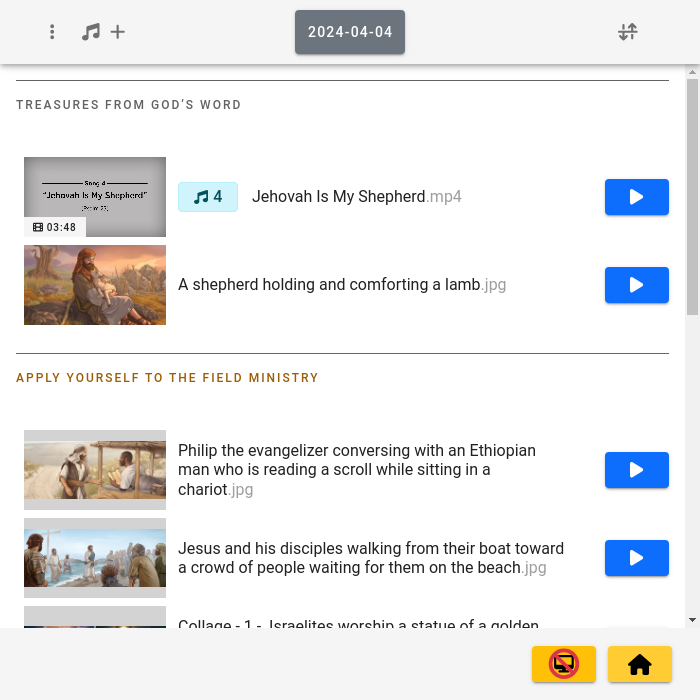
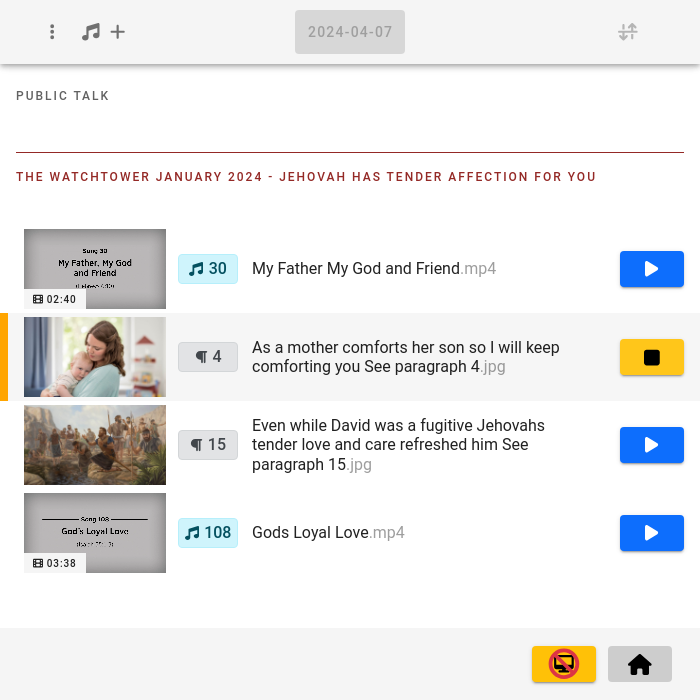
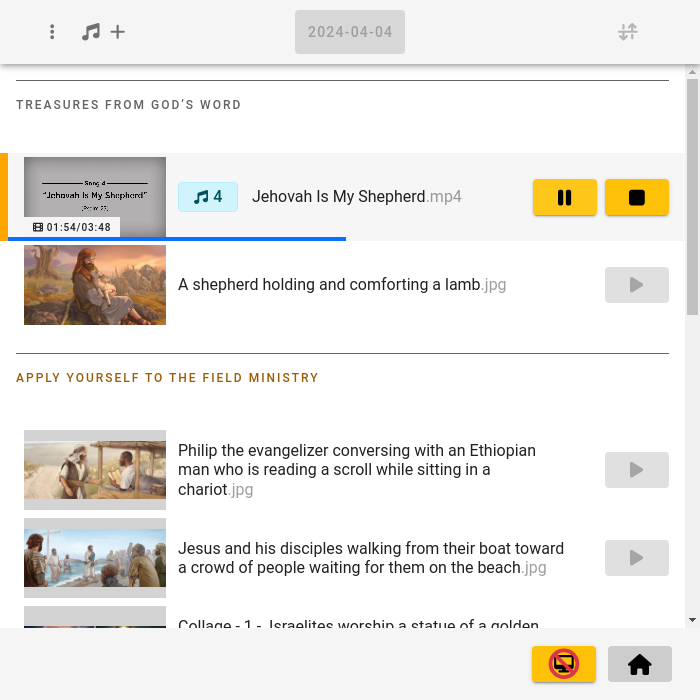
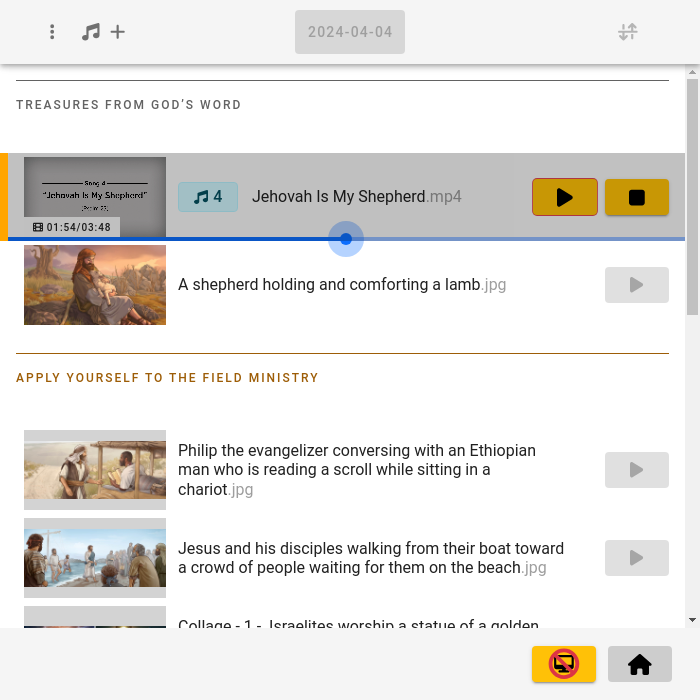
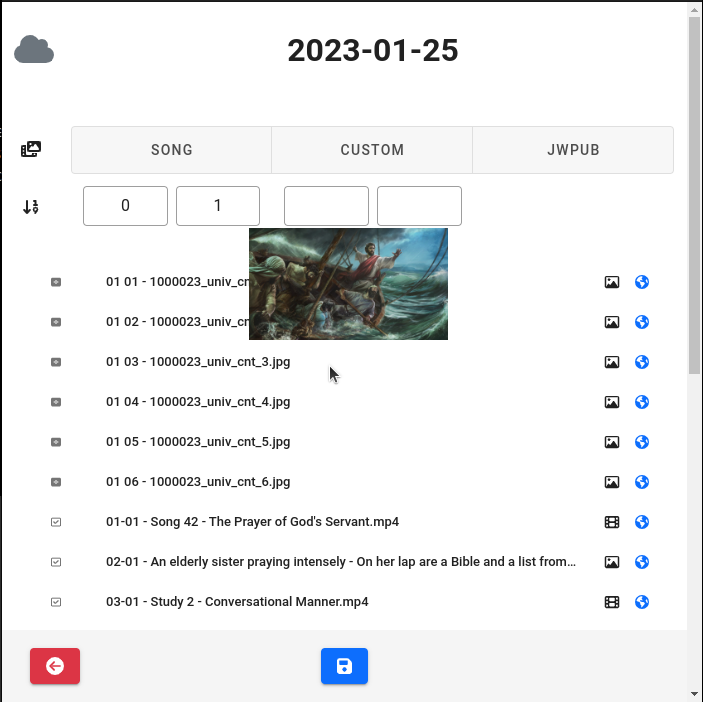
To play media, press the ▶️ (play) button for the file you’d like. To hide the media, press the ⏹️ (stop) button. A video can be rewound or fast-forwarded while paused, if desired. Please note that for videos, the stop button must be pressed twice to prevent accidentally and prematurely stopping a video while it is playing for the congregation. Videos will auto-stop when they have played in their entirety.

Extra Features

M³ has a few extra features that can be used to enhance the media presentation experience.

Present JW.org

To present JW.org, you can press the ⋮ (ellipsis) button at the top of the screen, and select Open JW.org. This will open a new controller window with JW.org loaded. The media window will also display JW.org. Now you can use the controller window to navigate JW.org, and the media window will display your actions. When you are done presenting JW.org, you can close the controller window, and continue with the normal media presentation mode.
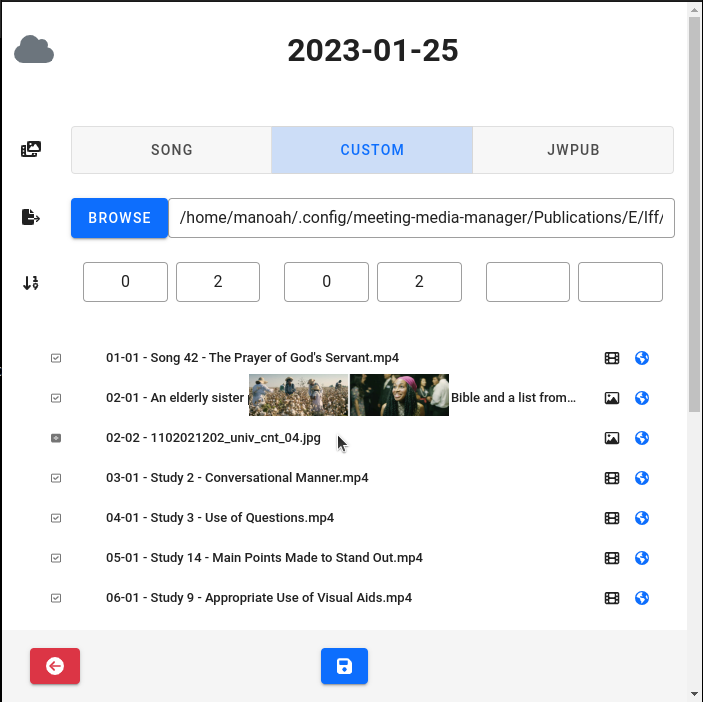
Zoom and pan images

When an image is being displayed, you can scroll the mouse wheel while hovering over the image preview to zoom in and out. Alternatively, you can also double click on the image preview to zoom in. Double clicking will alternate between 1.5x, 2x, 3x, 4x and back to 1x zoom. You can also hold and drag the image to pan around the image.

Sort the media list

The media list can be sorted by clicking the sort button at the top right of the screen. The media items will have a button appear next to them that can be used to drag the media item up or down in the list. When you are satisfied with the order, you can click the sort button again to lock the order.

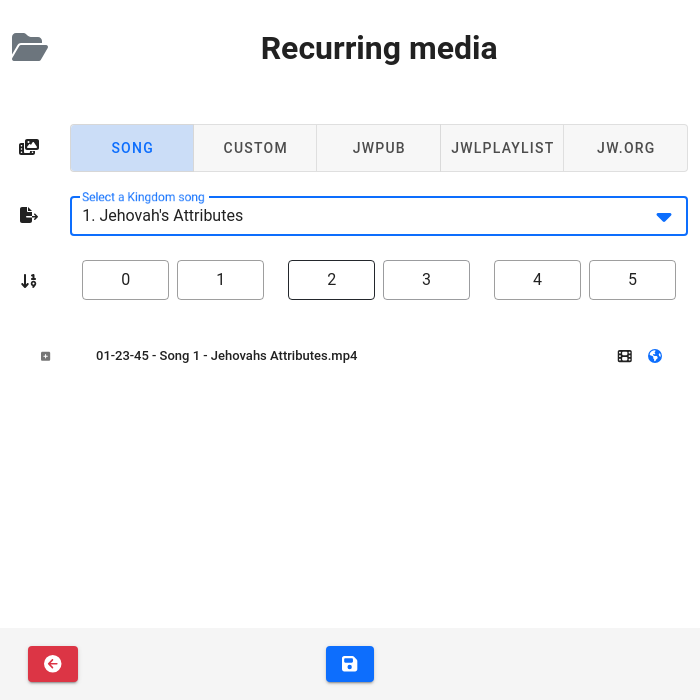
Add a last-minute song

If you need to add a last-minute song to the media list, you can press the ♫ + (add song) button at the top of the screen. A dropdown will appear with a list of all the Kingdom songs. When you select one, it will immediately be added to the top of the media list and it can be played instantly. It will either stream the song from JW.org, or play the song from the local cache if it was previously downloaded.

Conducting hybrid meetings using a combination of M³, OBS Studio, and Zoom

By far the simplest way to share media during hybrid meetings is by configuring OBS Studio, M³ and Zoom to work together.

Initial configuration: Kingdom Hall computer

Set the external monitor’s screen resolution to 1280x720, or something close to that.

Configure the computer sound card’s output to go to one of the sound booth mixer’s inputs, and the sound booth mixer’s combined output to go to the computer’s sound card input.

Initial configuration: OBS Studio

Install OBS Studio, or download the portable version.

If using the portable version of OBS Studio, install the Virtualcam plugin, and if using the portable version of OBS Studio, add the virtual camera to Windows by double-clicking the provided installation script.

If you have OBS Studio v27 or older, you need to install the obs-websocket plugin. Otherwise obs-websocket is included. Configure a port number and password for obs-websocket.

In the OBS settings, under General > System Tray, enable all checkboxes. Under Output > Streaming, enable a hardware encoder if available. Under Video > Base (Canvas) Resolution and Output (Scaled) Resolution, choose 1280x720, and under Downscale Filter, choose Bilinear.

Set up at least 2 scenes: one for the media display (Window Capture or Display Capture with the mouse cursor disabled and the appropriate window title/monitor selected), and one for the stage view (Video Capture Device with the KH camera selected). You can also add another scene specifically for pictures, where the media window is visible along with the podium in a picture-in-picture style display. You may add as many scenes as required, with the camera adjusted, zoomed-in and cropped as needed (lectern view, conductor and reader view, table view, etc.).

Enable the Scaling/Aspect Ratio filter on all Window Capture or Display Capture inputs, with a Resolution of Base (Canvas) Resolution. This will ensure that the media window is always scaled to the virtual camera’s output resolution.

Add a shortcut to OBS Studio, with the --startvirtualcam parameter, to the Startup folder of the Windows user profile, to ensure that OBS Studio gets started automatically when the user logs in.

Initial configuration: Kingdom Hall Zoom

Zoom should be configured to use dual monitors. Enable global keyboard shortcuts for Zoom to mute/unmute the Kingdom Hall audio in Zoom (Alt A), and start/stop the Kingdom Hall video feed in Zoom (Alt V).

Set the default “microphone” to be sound booth mixer’s combined output (so that everything that is heard over the Kingdom Hall sound system is transmitted over Zoom, including microphones and media) and the “camera” to be the virtual camera provided by OBS Studio.

Initial configuration: M³

Enable the Present media on an external monitor or in a separate window option.

Enable and configure OBS Studio compatibility mode, using the port and password information configured in the OBS Studio configuration step.

Starting the meeting

Start the Zoom meeting, and move the secondary Zoom meeting window to the external monitor. Make it fullscreen if desired. This is where any remote meeting participants will be displayed for the congregation to see.

Once the Zoom meeting is being displayed on the external monitor, open M³. The media presentation window will automatically open on top of Zoom on the external monitor. Sync media if necessary, and enter media controller mode by clicking the ▶️ (play) button on the main screen of M³, or Alt D.

Enable the Kingdom Hall video feed (Alt V), and spotlight the Kingdom Hall video feed if necessary so that Zoom participants see the Kingdom Hall stage. Unmute the Kingdom Hall audio feed in Zoom (Alt A). It should not be necessary to disable the video or audio feed in Zoom for the duration of the meeting. Make sure that “Original sound for musicians” is enabled in Zoom, to ensure the best audio quality for remote meeting participants.

Start background music playback using the button on the bottom left, or Alt K.

Broadcasting in-person parts from the Kingdom Hall stage over Zoom

No action necessary.

Various camera angles/zoom can be chosen during the meeting by using the menu on the bottom of the M³ media playback control window; this menu will contain a list of all configured camera view scenes in OBS.

Sharing media at the Kingdom Hall and over Zoom

Find the media you want to share in the M³ media playback control window, and press the “play” button.

When you’re done sharing media, press the “stop” button in M³. Note that videos automatically stop upon completion.

Displaying remote Zoom participants on the Kingdom Hall monitor

Press the “hide/show media presentation window” button in the lower right corner of the M³ media controller screen, or Alt Z, to hide the media presentation window. The Zoom meeting will now be visible on the Kingdom Hall monitor.

If the participant has media to show, follow the steps under the Sharing media at the Kingdom Hall and over Zoom subheading.

Once the participant has finished their part, press the “hide/show media presentation window” button in the lower right corner of the M³ media playback control window, or Alt Z, to show the media presentation window. The Kingdom Hall monitor will now show the yeartext.

Conducting hybrid meetings using only M³ and Zoom

If you do not wish to use OBS Studio for any reason, the following suggestions will perhaps help you to set things up as simply as possible.

Initial configuration without OBS: Kingdom Hall computer

Same as corresponding section above. With the addition of the global keyboard shortcut for Zoom for starting/stopping screen sharing (Alt S). The “camera” will be the camera feed from the Kingdom Hall camera.

Initial configuration without OBS: M³

Enable the Present media on an external monitor or in a separate window option.

Starting the meeting without OBS

Same as corresponding section above.

Broadcasting in-person parts from the Kingdom Hall stage over Zoom without OBS

Same as corresponding section above.

Sharing media at the Kingdom Hall and over Zoom without OBS

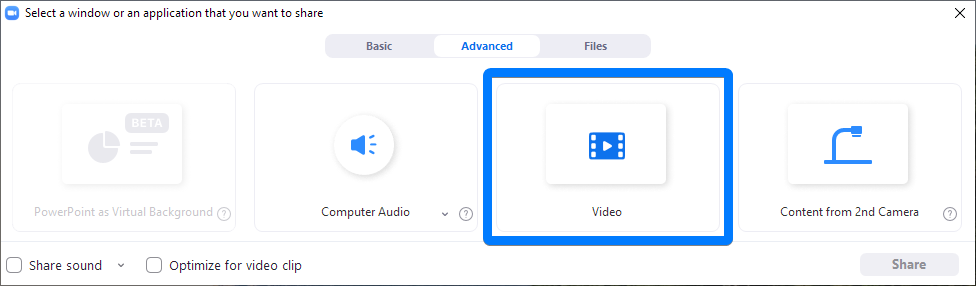
Start sharing in Zoom by hitting Alt S. In the Zoom sharing window that pops up, choose the external monitor and enable both checkboxes on the bottom left (for sound and video optimization). The yeartext will now be shared over Zoom.

Find the media you want to share in the M³ media playback control window, and press the “play” button.

When you’re done sharing media, hit Alt S to end Zoom screen sharing.

Displaying remote Zoom participants on the Kingdom Hall monitor without OBS

Same as corresponding section above.

Screenshots of Presentation Mode

Blue play button to enter media controller mode
List of media that is ready to be presented
Default media background, with automatically generated yeartext
Displaying a picture
Playing a video
Playing a video
Moving to a specific time in a video

Managing media

The media management screen allows the user to add or remove media for any given meeting, manage recurring media, and even add special media for other dates on which no meeting is normally scheduled.

Managing media for any particular day

To manage media for a certain meeting or day, simply click on that day’s tile on the main screen of M³. To manage media that be repeated at every meeting, click on the Recurring media tile.

Adding media

Here’s how to add media from the media management screen.

Option Explanation
Type of upload Choose from one of the 3 media types (see below).
Media to add Depends on the media type chosen (see below).
Filename prefix Up to 6 digits can be added before the media filename(s), to help with sorting.
Media list This shows the currently planned media for the selected date tile.

In the Media to add field, you’ll be presented with different options, depending on the media type selected.

Media type The Media to add field
Hira … shows a menu with all Kingdom song videos from the sjjm series, in the media language. Choose this option for example to add a song for the public talk, or for circuit overseer visits.

The selected song will be automatically downloaded from JW.org, in the congregation or group’s language, as configured in the Settings.
JWPUB … allows you to browse to (or drag and drop) a JWPUB file.

You’ll then be prompted to select the section, or chapter, from which you’d like to add media. This will add both embedded and referenced media from that section in the JWPUB file.

An example of a commonly used JWPUB file is the S-34, but any JWPUB file can be used here.
Hafa … allows you to browse to (or drag and drop) any other media file(s) from your computer.

Note that all PDF and SVG files will automatically be converted into high-resolution images by M³.
JW.ORG … allows you to select a video from the latest featured videos on JW.org.

Removing, hiding and showing media

To remove, hide, or show media, simply find the media file you don’t want, and click on the relevant icon.

A red 🟥 (delete) icon A ☑️ (checked checkbox) icon A 🔲 (unchecked checkbox) icon
The media file was added to that day’s media by you or the VO. The media file is referenced in the meeting’s material.

It will be downloaded from JW.org or extracted from the relevant publication.
The media file is referenced in the meeting’s material.

It was hidden by you or the VO, so it will not be downloaded or added to the meeting’s media.

Screenshots of the media management screen

Adding a song for a public talk
Adding an additional picture
Importing media from a section in a JWPUB file
Previewing media from a JWPUB file before importing
Renaming a media file

Installation

M³ does not require administrative privileges to install or run. To install M³, simply download the latest installer and run it.

Operating System File to download
Windows meeting-media-manager-[VERSION].exe
macOS meeting-media-manager-[VERSION].dmg
Linux meeting-media-manager-[VERSION].AppImage

What’s next?

Configure the app using the Settings screen.

Trouble installing?

Check the Technical usage notes for help.

FAQ

Does this app depend on external sites, sources or “curators” to download publications and meeting media?

No. The app behaves similarly to JW Library. It downloads publications and media directly from the official JW.org website and its content delivery network. At runtime, the app automatically determines what needs to be downloaded, such as media files and publications. The source code is available for all to examine and verify this.

Does this app infringe the JW.org Terms of Use?

No. The JW.org Terms of Use actually explicitly allow the kind of usage that we are making. Here is the relevant excerpt from those terms (emphasis mine):

You may not:

Create for distribution purposes, any software applications, tools, or techniques that are specifically made to collect, copy, download, extract, harvest, or scrape data, HTML, images, or text from this site. (This does not prohibit the distribution of free, non-commercial applications designed to download electronic files such as EPUB, PDF, MP3, and MP4 files from public areas of this site.)

Fifampifanarahan'ny fiangonana

The brother designated as videoconference organizer (VO) by the body of elders can use M³ to manage what media is made available to the technical A/V support team in his congregation.

The VO, or someone designated by him, can:

  • upload additional media to be shared during a meeting, such as for the circuit overseer’s visit, or for public speakers’ talks
  • hide media from JW.org that isn’t relevant for a given meeting, for example, when a part has been replaced by the local branch
  • add or remove recurring media, such as a year-text video, or an announcement slide

All who are synced to the same congregation will then receive the exact same media when they click the Update media folders button.

Please note that the congregation sync feature is opt-in and entirely optional.

How it works

M³’s underlying sync mechanism uses WebDAV. This means that the VO (or someone under his supervision) needs to either:

  • set up a secured WebDAV server that is web-accessible, or
  • use a third-party cloud storage service that supports the WebDAV protocol (see the Web address setting in the Congregation sync setup section below).

All users that wish to be synchronized together will need to connect to the same WebDAV server using the connection information and credentials provided to them by their VO.

Firafitrin’ny fifampifanarahan’ny fiangonana

Setting Explanation
Adiresin'ny tranokala Web address of the WebDAV server. Secure HTTP (HTTPS) is required.

Note: The Web address button, once clicked, will show a list of WebDAV providers that have been known to be compatible with M³, and will automatically prefill certain settings for those providers.

This list is provided as a courtesy, and in no way represents an endorsement of any particular service or provider. The best server is always the one you own…
Solon'anarana Username for the WebDAV service.
Tenimiafina Password for the WebDAV service.

Note: As detailed in their respective support pages, an app-specific password might need to be created for Box and Koofr in order to enable WebDAV connections to their services.
Congregation sync folder This is the folder that will be used to synchronize media for all congregation sync users. You can either type/paste in a path, or use your mouse to navigate to the target folder.

Note: Make sure that all congregation sync users input the same folder path; otherwise the sync won’t work as expected.
Congregation-wide settings Once the VO has configured the Media setup and Meeting setup sections of the Settings on his own computer, he can then use this button to enforce certain settings for all congregation sync users (for example, meeting days, media language, conversion settings, and so on). This means that the selected settings will be forcefully applied for all synced users every time they open M³.

Using congregation sync to manage media

Once the congregation sync setup is complete, you’re ready to start Managing media for your congregation’s technical AV support team.

Screenshots of congregation sync in action

Firafitrin'ny fifampifanarahan'ny fiangonana

Settings

The Settings screen is divided into 4 sections. Most of the options are self-explanatory, but here are a few additional details.

Firafitrin’ny fitaovana

Setting Explanation
Tsy andefa internet If enabled, M³ will not attempt to connect to JW.org or your congregation server. This is useful for when you have a poor internet connection and want to save bandwidth.
Theme preference Select the theme you prefer. If you select System, M³ will use the system’s theme.
Anaran'ny fiangonana The name of your congregation. This is used to support multiple congregations who share the same computer.
Fitenin'ny fitaovana Sets the language in which M³ is displayed.

Thank you to our many contributors for translating the app in so many languages! If you want to help improve an existing translation or add a new one, please open up a new discussion.
Toerana hametrahana ny Sary/Video Meeting media will be saved to this folder for later sharing and use.
Custom cache path By default, publications and other data are saved in a different directory for each user. You can change this directory if you want to share the cached data between multiple users on the same computer.
Date format for meeting folders The date format used for the meeting folders.

Note: When using a congregation server, please ensure that everyone configures the same date format by enforcing it using Congregation-wide settings.
Alefa hoazy ity programa ity rehefa velona ity fitaovana ity If enabled, M³ will launch when the current user logs into the computer.

Note: Unavailable on Linux.
Automatically initiate media sync If enabled, this option will automatically initiate a media sync 5 seconds after M³ is launched.

To prevent the automatic sync from occurring when this setting is enabled, press the ⏸ (pause) button before the 5-second timer is up.
Sokafana ny toerana misy ny Sary/Video rehefa vita ny fampifanarahana If enabled, the folder containing the downloaded media for the chosen week will open in the computer’s file manager after the media sync is complete.
Quit app after media sync If enabled, this option will automatically quit M³ 5 seconds after the media sync is complete.

To prevent M³ from quitting automatically when this setting is enabled, press the 🏃 (person leaving/running) button before the 5-second timer is up.
Enable OBS Studio compatibility mode If enabled, this option will tap into OBS Studio to change scenes automatically as needed both before and after sharing media.

If enabling this setting, make sure that OBS Studio is configured to use the obs-websocket plugin, which is what will enable M³ to communicate with OBS Studio.

Also, configure all needed scenes for media sharing and stage display in OBS. At the very least, you’ll need a scene with a Window Capture (recommended) or Display Capture configured to capture the M³ media presentation window, or the screen on which the media will be presented.

You’ll also need to configure all desired stage view scenes, for example: a shot of the lecturn, a wide shot of the stage, etc.
"Port" Port on which the obs-websocket plugin is configured to listen.
Tenimiafina Password configured in the obs-websocket plugin’s settings.
Default stage view scene in OBS Studio Select which scene should be selected by default when media presentation mode is launched. Usually a stage wide view, or a shot of the lectern.
Media window scene in OBS Studio Select which scene is configured in OBS Studio to capture the M³ media window.
Optional separate media scene for images An optional scene to select an alternative scene for showing images. This is useful if you want to show images in a different way than videos (for example, with the stage overlaid in a picture-in-picture style).
OBS Studio scene to display Zoom participants An optional scene to quickly and efficiently manage the display of Zoom participants during hybrid meetings.

When this scene is configured, the behavior of the Media Presentation mode changes somewhat. When in this mode, a toggle button will appear which, when enabled, will cause the media window to be hidden, and the Zoom scene to be shown. The OBS scene picker will also be hidden. Sharing media will automatically show the media scene as per usual, and after sharing media, the media window will disappear immediately.

When the toggle is disabled, the media window and scene pickers will be shown again.
Andefa ny fifandraisana amin'ny Zoom When enabled, this feature will attempt to automate various pre-meeting (mute all, enable the Kingdom Hall’s video/audio, disable the option for participants to unmute themselves), in-meeting (select participants to spotlight and unmute them, or to mute them, lower their hand and remove the spotlight) and post-meeting (disable the Kingdom Hall’s video feed, allow participants to unmute themselves) tasks.

Note: This is still a beta feature. Please test test it thoroughly before implementing it and always verify that the automation was correctly executed.
Zoom participant name This is the name that M³ will use to join the Zoom meeting.
Zoom Meeting ID The Meeting ID of the Zoom meeting that M³ should join.
Tenimiafina The password of the Zoom meeting that M³ should join.
Spotlight video when starting the meeting When enabled, M³ will automatically spotlight the Kingdom Hall’s video feed when the “start meeting” automation is executed.
Hide Zoom component by default When enabled, the Zoom component will be hidden by default. The Zoom component is a required floating component that represents the M³ participant in the Zoom meeting. You can control the M³ participant with it.
Automatically perform start meeting actions When enabled, M³ will automatically perform the “start meeting” actions, a configured amount of minutes before the meeting is scheduled to start. These actions are: disallow participants to unmute themselves, mute all, ask host to enable video and microphone and optionally spotlight the Kingdom Hall’s video feed.
Automatically rename Zoom participants With this setting, you can add a rename rule to automatically rename certain Zoom participants. This is useful if you want to rename participants who consistently join with a wrong or incomplete name. Rules must be entered in the following format: Old Name=New Name.
Enable beta updates for testing purposes When enabled, M³ will automatically receive beta updates, which are released daily and contain the latest features and fixes.

Note: Do not enable this setting on the computer used to present media at the Kingdom Hall.
Hajanona ny fanavaozana mandeha ho azy When this option is enabled, M³ will not automatically self-update when closed.
Disable hardware acceleration Only enable this setting if you are experiencing issues with media presentation mode. Changing this setting will cause M³ to restart.

Firafitrin’ny fifampifanarahan’ny fiangonana

See the Congregation sync section for details on what this does exactly and how to configure this section.

Media setup

Setting Explanation
Fitenin'ny Sary/Video Select the language of your congregation or group. All media will be downloaded from JW.org in this language.
Fiteny faharoa ampiasaina, raha tsy misy ho an'ny voalohany This language is used whenever the primary media language is not available.

For example, if you select Irish as your media language and English as your fallback, whenever a publication or video is not available in Irish, it will be fetched in English.
Maximum resolution for videos Videos downloaded from JW.org will be downloaded at this resolution, or the next available lower resolution. Useful for limited or low-bandwidth situations.
Hampiseho ny soratra eny ambany Enable this option if you want to fetch subtitles for videos, whenever available. Subtitles will be shown by default, but can be toggled on/off while presenting. The vertical position of the subtitles can be changed by clicking the subtitles icon inside the video preview.
Avadika ho MP4 ny video This will automatically convert all picture and audio files into MP4 format, for use with Zoom’s native MP4 sharing feature during fully remote congregation Zoom meetings. This includes all pictures and media files downloaded from JW.org, as well as additional media files added by the user or the VO.

Note: This option is best suited for remote-only congregation Zoom meetings. If conducting either hybrid or regular congregation meetings, look into using Media Presentation mode by activating the Present media on an external monitor or in a separate window option instead, and disable this option.
Tsy esorina ireo Sary/Video tena izy ahorinan'ny famadihana azy If this setting is enabled, picture and audio files will be kept in the media folder after being converted to MP4 format, rather than deleted. This will result in a slightly more cluttered media folder, and generally does not need to be enabled if sharing media through Zoom MP4 sharing. (See Convert media to MP4 format above.)

Note: Only visible if Convert media to MP4 format is also enabled.
Hampiseo ny Sary/Video amin'ny efijery na "fenêtre" manokana This setting will allow you to use M³ to present pictures, videos and audio files during hybrid or in-person congregation meetings. The media playback management screen can then be accessed by clicking the ▶️ (play) button on the main screen of M³.

The media presentation screen will automatically use an external monitor if present; if not, the media will be displayed in a separate, resizable window.

Note: This option is best suited for either hybrid or regular congregation meetings.

If conducting remote-only congregation Zoom meetings, look into activating the Convert media to MP4 format option and sharing the media with Zoom’s native MP4 sharing instead.
Background image for media presentation mode By default, M³ will attempt to fetch the current year’s text in the language selected previously, in order to display it on a black background when in Media Presentation mode and no other media is being played. If the automatic yeartext retrieval fails for some reason, or if you wish to display a different background image, you can either use the ‘Browse’ button to select a custom picture, or the ‘Refresh’ button to try fetching the yeartext automatically again.

Note: If Congregation sync is enabled, selecting a custom background image will synchronize it for all congregation sync users automatically.
Hesorina ny fampisehoana Sary/Video rehefa tapitra ny Sary/Video mandeha If enabled, the media window will be hidden immediately after each media file has finished playing.

Note: This setting is especially useful for sign-language meetings.
Alefa hoazy ny Sary/Video voalohany If enabled, the first media item in the media list will automatically start playing a configurable number of minutes before the meeting is supposed to start.
Enable keyboard shortcuts during media playback This setting allows you to set custom key combinations to play and stop media. This is useful in combination with a USB remote control, for example.
Create playlists for use with VLC Enable this if you want to generate playlists for every meeting automatically, which can then be loaded in VLC, if you are using that app to display media instead of Media Presentation mode.
Exclude all media from the th brochure If enabled, this will prevent media from the Apply Yourself brochure from being included at every midweek meeting.
Exclude Enjoy Life Forever images outside the Congregation Bible Study If enabled, this will prevent images from the Live Forever book (lff) from being included, for example for student assignments during the midweek meeting.
Include printed media when available If enabled, renderings of the printed editions of publications will be included when available. This could be useful for some tables or groups of images that are clearer in printed form.

Meeting setup

Setting Explanation
Special congregation If enabled, no media will be downloaded from JW.org. Only manually added media will be available. This is useful for theocratic schools, for example.
Fivoriana andavanandro Indicate the usual day and time for the midweek meeting; used for folder naming and automatic background music fade-out (see below).
Fivoriana faran’ny herinandro Indicate the usual day and time for the weekend meeting.
Fitsidihan'ny mpiandraikitrin'ny faritra manaraka When you select a date for the next planned visit of the circuit overseer, M³ will automatically set the midweek meeting day for that week to Tuesday, skip the Congregation Bible Study media, as well as skip the concluding Kingdom songs for both meetings.

Note: When using a congregation server, make sure to enforce this setting so that all connected brothers have the same circuit overseer visit date configured.
Ampiseho ny bokotra ahafahana mandefa ny hira alohan'ny fivoriana Enable a button on the main screen which will play Kingdom songs from the sjjm series, in random order. This is useful, for example, to play songs before and after meetings at the Kingdom Hall as background music. To the right of this option is a button to download all available Kingdom songs, which could be useful to prevent buffering delays.
Background music playback volume Sets the volume at which the background music will play.
Halefa hoazy ny hira alohan'ny hanombohan'ny fivoriana If enabled, background music will automatically start playing at app startup when it’s a meeting day and the meeting is starting in less than an hour.
Automatically stop playing background music If Enable button to play background music is active, then this setting will allow you to specify a delay after which background music should be automatically stopped. This can be either a set number of minutes, or a predetermined number of seconds before the start of the meeting (in the case where the background music was started before a meeting).

Screenshots of the settings screen

Firafitrin'ny fitaovana
Media setup
Media setup
Meeting setup
Meeting setup

Issues and feature requests

How do I report an issue or bug I encountered?

If ever you run into any issues with M³, please use GitHub Issues to report it. Bug fixes are issued on a regularly basis, usually monthly.

How can I request new features?

I’m open to suggestions! Please use GitHub Discussions to discuss potential new features.